
This tutorial will teach you how to create a cool looking shaky menu with ActionScript 3. All the animation is done with ActionScript, so no timeline animation is needed. Check out the end result!
Get TweenMax
We will use TweenMax for the animation of the menu items. Therefore, download TweenMax for AS3. TweenMax will save us a lot of time from coding the animation ourselves! Save the “gs” folder to the same location where your .fla file will be located.New Document
Start your Flash and create a new Flash ActionScript 3 document.
Flash Document Properties
Set the following document properties.width: 400px
height: 100px
background color: black
frame rate: 30

Menu Rectangle Shape (...)
Draw a rectangle on the stage with the following properties.width: 8px
height: 8px
stroke color: no stroke!
fill color: #FF8800

Menu Rectangle MovieClip
Convert the rectangle to a movie clip (select the rectangle and hit F8). Name it “Menu Rectangle” and set the registration point to the center. Also link the rectangle to a class named “MenuRectangle”.
More Menu Rectangles!
As you can see from the finished movie, we need each menu item to have multiple menu rectangles. Therefore, drag 7 more menu rectangles to the stage (you should now have a total of 8 menu rectangles on stage). Align them horizontally and space them evenly. You can use the align functionality to help you out. Note that you should not have the “To stage” button selected when you space the rectangles evenly…
and Even More Menu Rectangles!
We still need more menu rectangles in our menu button. Therefore, select all the eight (8) menu rectangles, hold down the Alt-key and and drag-and-drop the new menu rectangles below the first row. Create a third row as well. You should now have a rectangle matrix of sixe 8×3 (8 colums and 3 rows).
Home Button MovieClip
Now we are ready to create a menu button movie clip. Select all the menu rectangles and convert them to a single movie clip. Name it “Home Button” and set the registration point to the center.
Button Label
Double click the home button movie clip on the stage to get “inside” it. While inside the movie clip, select all the menu rectangles and set the alpha to 30%.
Layer for the Menu Text
While still inside the home button movie clip, create a new layer named “text”.
Text Field
In the text layer, create a static text field and type “Home” in it. Position the text field on top of the menu rectangles and size it so that it covers most of the rectangles area. Set the following properties.font: Berlin Sans
size: 14 pt
color: white
format: center

Hit Area Layer
While still inside the home button movie clip, create a new layer named “hit area”.
Hit Area MovieClip
In the hit area layer, draw a white rectangle so that it covers all the menu rectangles. Convert the rectangle to a movie clip. Name it “Hit Area” and set the registration point to the center.
Instance Name
Give the hit area movie clip an instance name of “mouseArea”.
Hit Area Alpha
We don’t want the hit area to be visible, its only function is to catch mouse events via ActionScript. Therefore, set the alpha to zero for the hit area.
ActionScript Layer
While still inside the home button movie clip, create a new layer named “actions”.
ActionScript – Initial Operations
Now that we have all the necessary graphics and movie clips ready, we can move to ActionScript. So in the actions layer, type the following.
The code should be quite straightforward. We first import TweenMax and the create an array which will contain all our menu rectangles. In the for loop we go through all the items that are on the stage. We check if the item is a menu rectangle and if it is, we add it into our rectangles array. This way it’s really easy to add more rectangles in out buttons without modifying the ActionScript code.
ActionScript – Mouse Handlers
Type the following code to add some mouse functionality.
As you see we listen when the cursor is over or out of the mouse area and also when the mouse area is clicked. In the mouseOverHandler() function we calculate random target coordinates for for each menu rectangle. Then we use TweenMax to animate the menu rectangles to the coordinates. We also tween the rectangles’ colors and alpha. We also add an ENTER_FRAME listener for the shake effect (we look at that in the next step). In the mouseOutHandler() we simply tween the menu rectangles to their original state.
If the item is clicked we navigate to an URL. Next we look at the shake() function, which is responsible for the whole shake effect.
ActionScript – Shake Effect
To add the shake effect, type the following code.
Creating More Buttons
Now we have a single button working, you can test your movie! However, we normally have more than one button in our menus, so let’s see how we would accomplish that.Duplicate Movie Clips
As an example we’ll create an “About” button. First go to the main timeline. In the library, right click the “Home Button” movie clip and select “Duplicate”.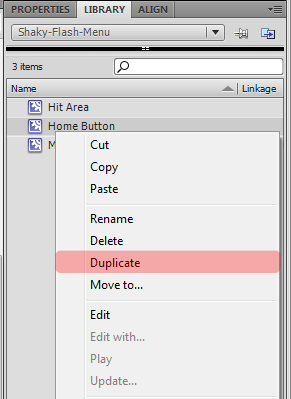
About Button Movie Clip
Flash will ask for a name for the new movie clip so name it “About Button”.
source : http://tutorials.flashmymind.com/2009/05/shaky-flash-menu-with-actionscript-3/

0 comments:
Post a Comment